Nginx反向代理
[TOC]


1 Nginx 正向代理

1.1 场景
用户想通过 A(172.16.249.1)访问 C(172.16.249.102) 上的服务,但是由于防火墙或者网络策略,无法直接访问。
用户发现 B(172.16.249.101)可以访问 C(172.16.249.102) 上的服务;注意这时候用户是知道B和C的,所以用户想那我是否能够将我想请求的信息发送给B,让B来进行访问并将结果返回回来。
B服务器上搭建Nginx服务并配置
正向代理;A服务器配置网络访问时,通过B的代理进行处理
这时A就可以通过B来访问C上的资源了。
1.2 操作
1.2.1 客户端A
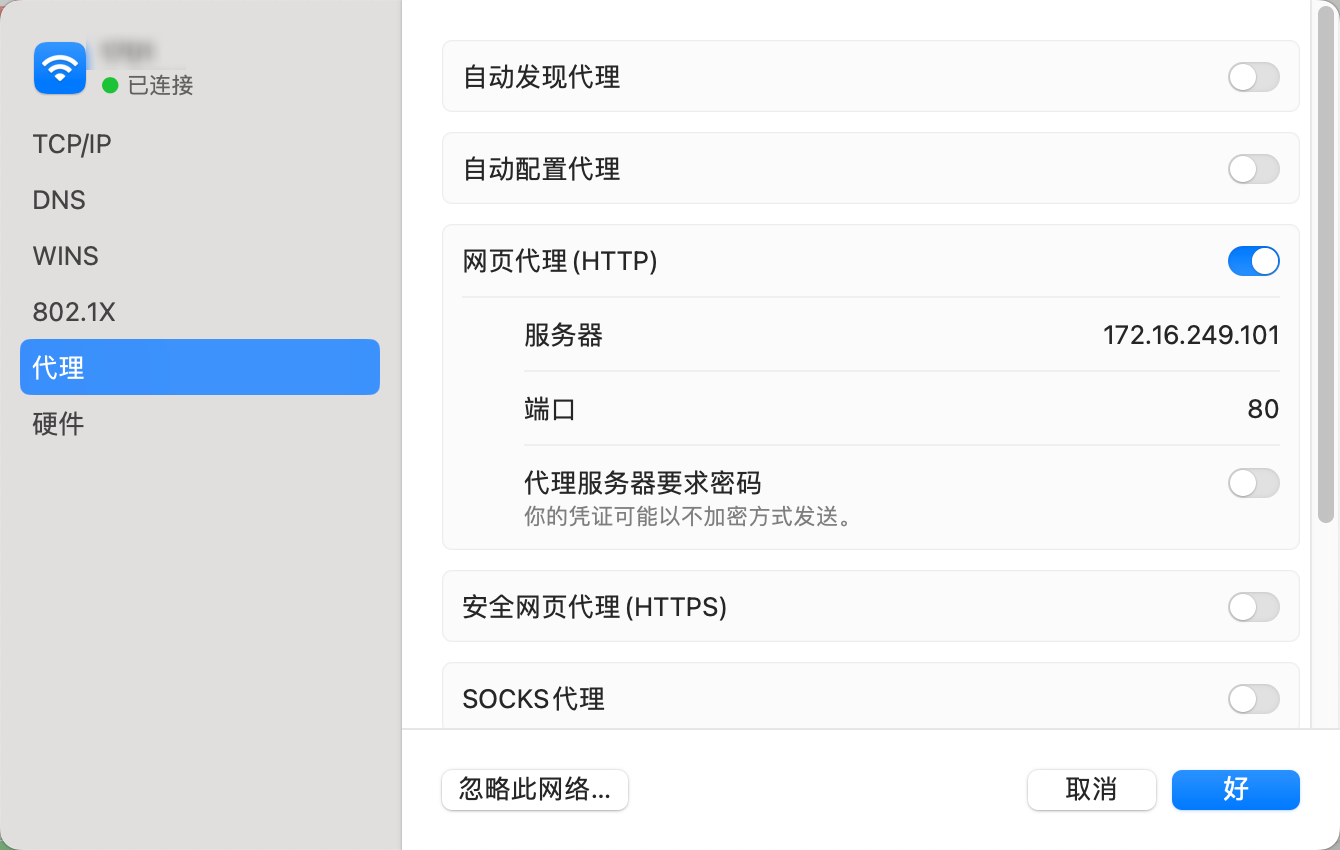
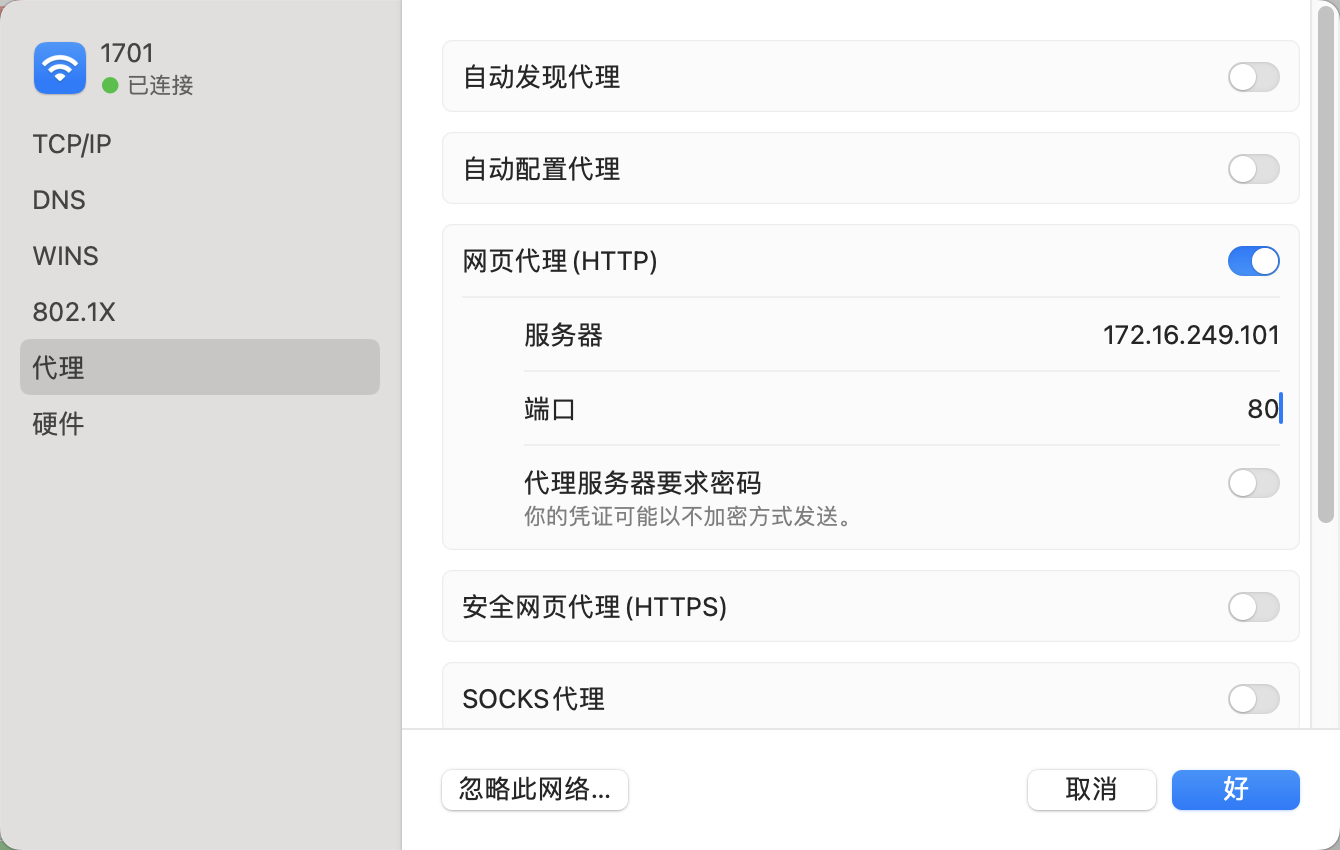
配置网络代理,不同系统不一样,比如MacOS可以通过 设置 - 网络 - 代理 - HTTP (B服务器IP、B服务器Nginx监听端口)
1.2.2 正向代理服务器B
安装并配置Nginx服务
1
2
3
4
5
6
7
8
9
10
11
12
13
14
15
16
17
18
19
20
21
22
23
24下载nginx https://nginx.org/en/download.html
wget https://nginx.org/download/nginx-1.22.1.tar.gz
tar -zxvf nginx-1.22.1.tar.gz
sudo mkdir /usr/local/nginx
注意安装必要依赖
yum -y install gcc-c++ zlib zlib-devel openssl openssl-devel pcre pcre-devel gcc
cd nginx-1.22.1 && ./configure --prefix=/usr/local/nginx --user=nginx --group=nginx --with-http_ssl_module --with-http_v2_module --with-http_realip_module --with-http_stub_status_module --with-http_gzip_static_module --with-pcre --with-stream --with-stream_ssl_module --with-stream_realip_module
make -j8 && make install
配置环境变量
vim ~/.bash_profile
添加
export PATH=/usr/local/nginx/sbin:$PATH
重载配置文件
source ~/.bash_profile
添加Nginx组与用户(若不添加启动时候报错:nginx: [emerg] getpwnam(“nginx“) failed)
sudo groupadd nginx
sudo useradd -r nginx
sudo usermod -aG nginx nginx修改Nginx配置文件
1
2
3
4
5
6
7
8
9
10
11
12
13
14
15
16
17
18
19
20
21
22
23
24
25
26
27
28
29
30
31
32
33
34
35
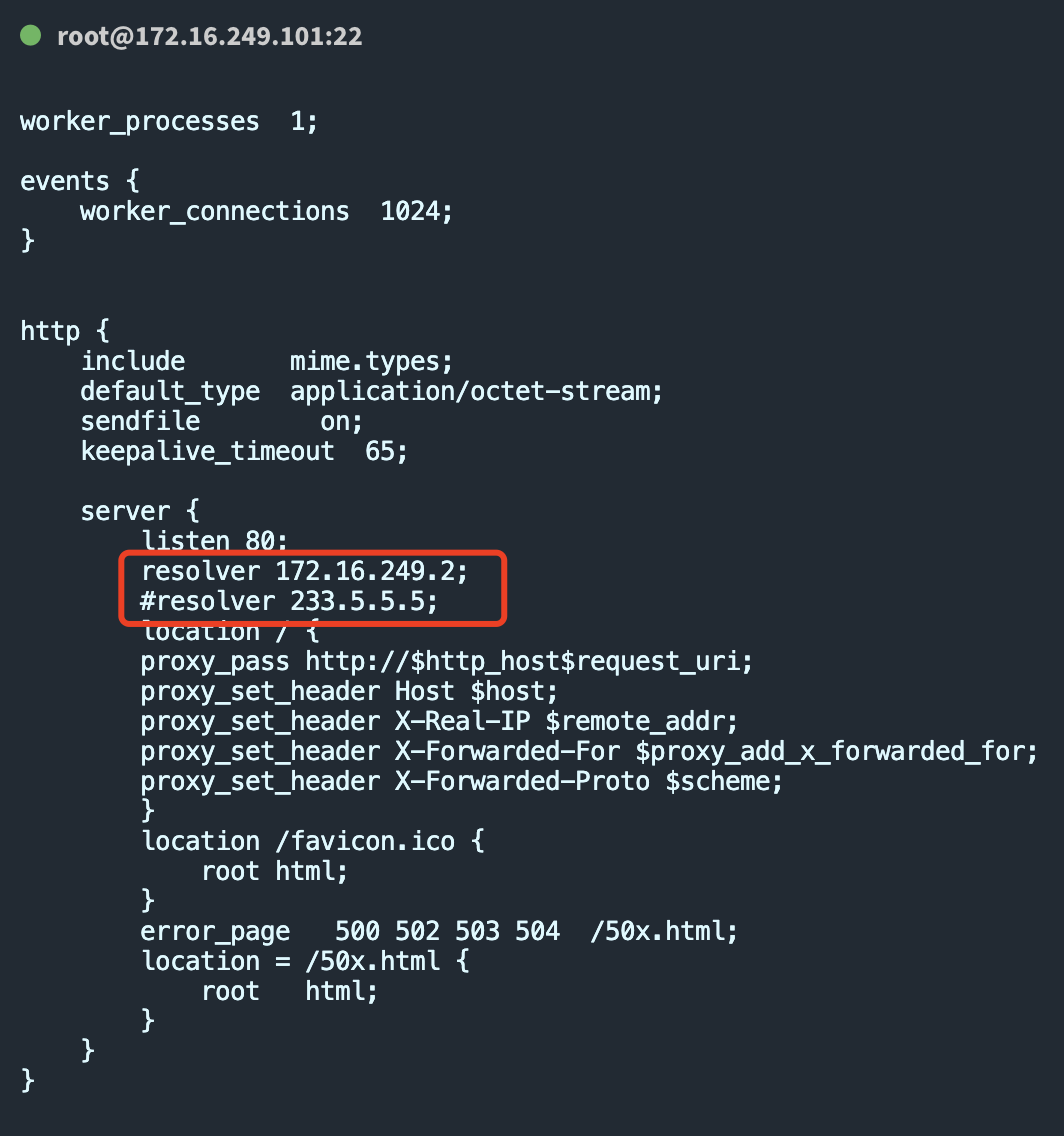
36vim /usr/local/nginx/conf/nginx.conf
# nginx.conf
# 正向代理比较简单,不需要设置 server_name啥的,只需要listen port并且直接通过代理服务器proxy_pass进行流量访问
worker_processes 1;
events {
worker_connections 1024;
}
http {
include mime.types;
default_type application/octet-stream;
sendfile on;
keepalive_timeout 65;
server {
listen 80;
resolver 172.16.249.2; # 这里的DNS服务器最好选用当前代理服务器的网关服务器IP,选其他的可能会502
location / {
proxy_pass http://$http_host$request_uri; # 注意$http_host带端口,$host不带端口别用错了
proxy_set_header Host $host;
proxy_set_header X-Real-IP $remote_addr;
proxy_set_header X-Forwarded-For $proxy_add_x_forwarded_for;
proxy_set_header X-Forwarded-Proto $scheme;
}
location /favicon.ico {
root html;
}
error_page 500 502 503 504 /50x.html;
location = /50x.html {
root html;
}
}
}配置nginx启动服务
1
vim /etc/init.d/nginx
插入以下文本:
1
2
3
4
5
6
7
8
9
10
11
12
13
14
15
16
17
18
19
20
21
22
23
24
25
26
27
28
29
30
31
32
33
34
35
36
37
38
39
40
41
42
43
44
45
46
47
48
49
50
51
52
53
54
55
56
57
58
59
60
61
62
63
64
65
66
67
68
69
70
71
72
73
74
75
76
77
78
79
80
81
82
83
84
85
86
87
88
89
90
91
92
93
94
95
96
97
98
99
100
101
102
103!/bin/sh
nginx - this script starts and stops the nginx daemon
# chkconfig: - 85 15
description: Nginx is an HTTP(S) server, HTTP(S) reverse proxy and IMAP/POP3 proxy server
processname: nginx
config: /usr/local/nginx/conf/nginx.conf
pidfile: /usr/local/nginx/logs/nginx.pid
Source function library.
. /etc/rc.d/init.d/functions
Source networking configuration.
. /etc/sysconfig/network
Check that networking is up.
[ "$NETWORKING" = "no" ] && exit 0
nginx="/usr/local/nginx/sbin/nginx"
prog=$(basename $nginx)
NGINX_CONF_FILE="/usr/local/nginx/conf/nginx.conf"
lockfile=/var/lock/subsys/nginx
start() {
[ -x $nginx ] || exit 5
[ -f $NGINX_CONF_FILE ] || exit 6
echo -n $"Starting $prog: "
daemon $nginx -c $NGINX_CONF_FILE
retval=$?
echo
[ $retval -eq 0 ] && touch $lockfile
return $retval
}
stop() {
echo -n $"Stopping $prog: "
killproc $prog -QUIT
retval=$?
echo
[ $retval -eq 0 ] && rm -f $lockfile
return $retval
}
restart() {
configtest || return $?
stop
start
}
reload() {
configtest || return $?
echo -n $"Reloading $prog: "
killproc $nginx -HUP
RETVAL=$?
echo
}
force_reload() {
restart
}
configtest() {
$nginx -t -c $NGINX_CONF_FILE
}
rh_status() {
status $prog
}
rh_status_q() {
rh_status >/dev/null 2>&1
}
case "$1" in
start)
rh_status_q && exit 0
$1
;;
stop)
rh_status_q || exit 0
$1
;;
restart|configtest)
$1
;;
reload)
rh_status_q || exit 7
$1
;;
force-reload)
force_reload
;;
status)
rh_status
;;
condrestart|try-restart)
rh_status_q || exit 0
;;
*)
echo $"Usage: $0 {start|stop|status|restart|condrestart|try-restart|reload|force-reload|configtest}"
exit 2
;;
esac添加执行权限与开机启动
1
2
3
cd /etc/init.d
chmod 755 /etc/init.d/nginx (添加权限)
chkconfig --add nginx (设置开机启动,注意add前面是两个短横线-)测试并启动Nginx服务
1
2
3
4
5
6
7
8
# 测试并启动Nginx
nginx -t
nginx
# 如果后续修改配置后注意重载
nginx -s reload
# service nginx start/stop/restart/reload
1.2.3 资源服务器C
使用firewall防火墙,拒绝A服务器的连接,开放B服务器的连接,模拟 AC不通、BC通的策略;
启动一个简单的web服务
1
2
3
# https://blog.csdn.net/W1124824402/article/details/126526993
python -m SimpleHTTPServer 8000 # 直接执行,Python内置的web小实例
# nohup python -m SimpleHTTPServer 8000 &firewall防火墙配置
1
2
3
4
5
6
7
8
9
10
11
12
13
14
15
16
17
18
19
20
21
22
23
24
25
26
27
systemctl enable firewalld.service
systemctl start firewalld.service
systemctl status firewalld.service
systemctl disable firewalld.service
systemctl stop firewalld.service
查看防火墙状态
firewall-cmd --state
查看防火墙现有规则
firewall-cmd --list-all
IP白名单设置
开启某个端口(指定IP可访问)
firewall-cmd --permanent --zone=public --add-rich-rule="rule family="ipv4" source address="172.16.249.101/32" port protocol="tcp" port="8000" accept"
删除策略(不用执行,知道怎么remove掉就行)
firewall-cmd --permanent --zone=public --remove-rich-rule="rule family="ipv4" source address="172.16.249.101/32" port protocol="tcp" port="8000" accept"
开启某个端口-所有IP可访问(不用执行)
firewall-cmd --permanent --zone=public --add-port=80/tcp
删除策略(不用执行)
firewall-cmd --permanent --zone=public --remove-port=80/tcp
重载防火墙
firewall-cmd --reload
1.3 测试
如此就可以达到这个网络图谱的要求了,我们可以对A机器的代理配置启用和关闭来测试Nginx正向代理的功能;
1.3.1 未开启代理
未开启代理无法访问到资源,因为.1无法直接访问.102的资源(防火墙)

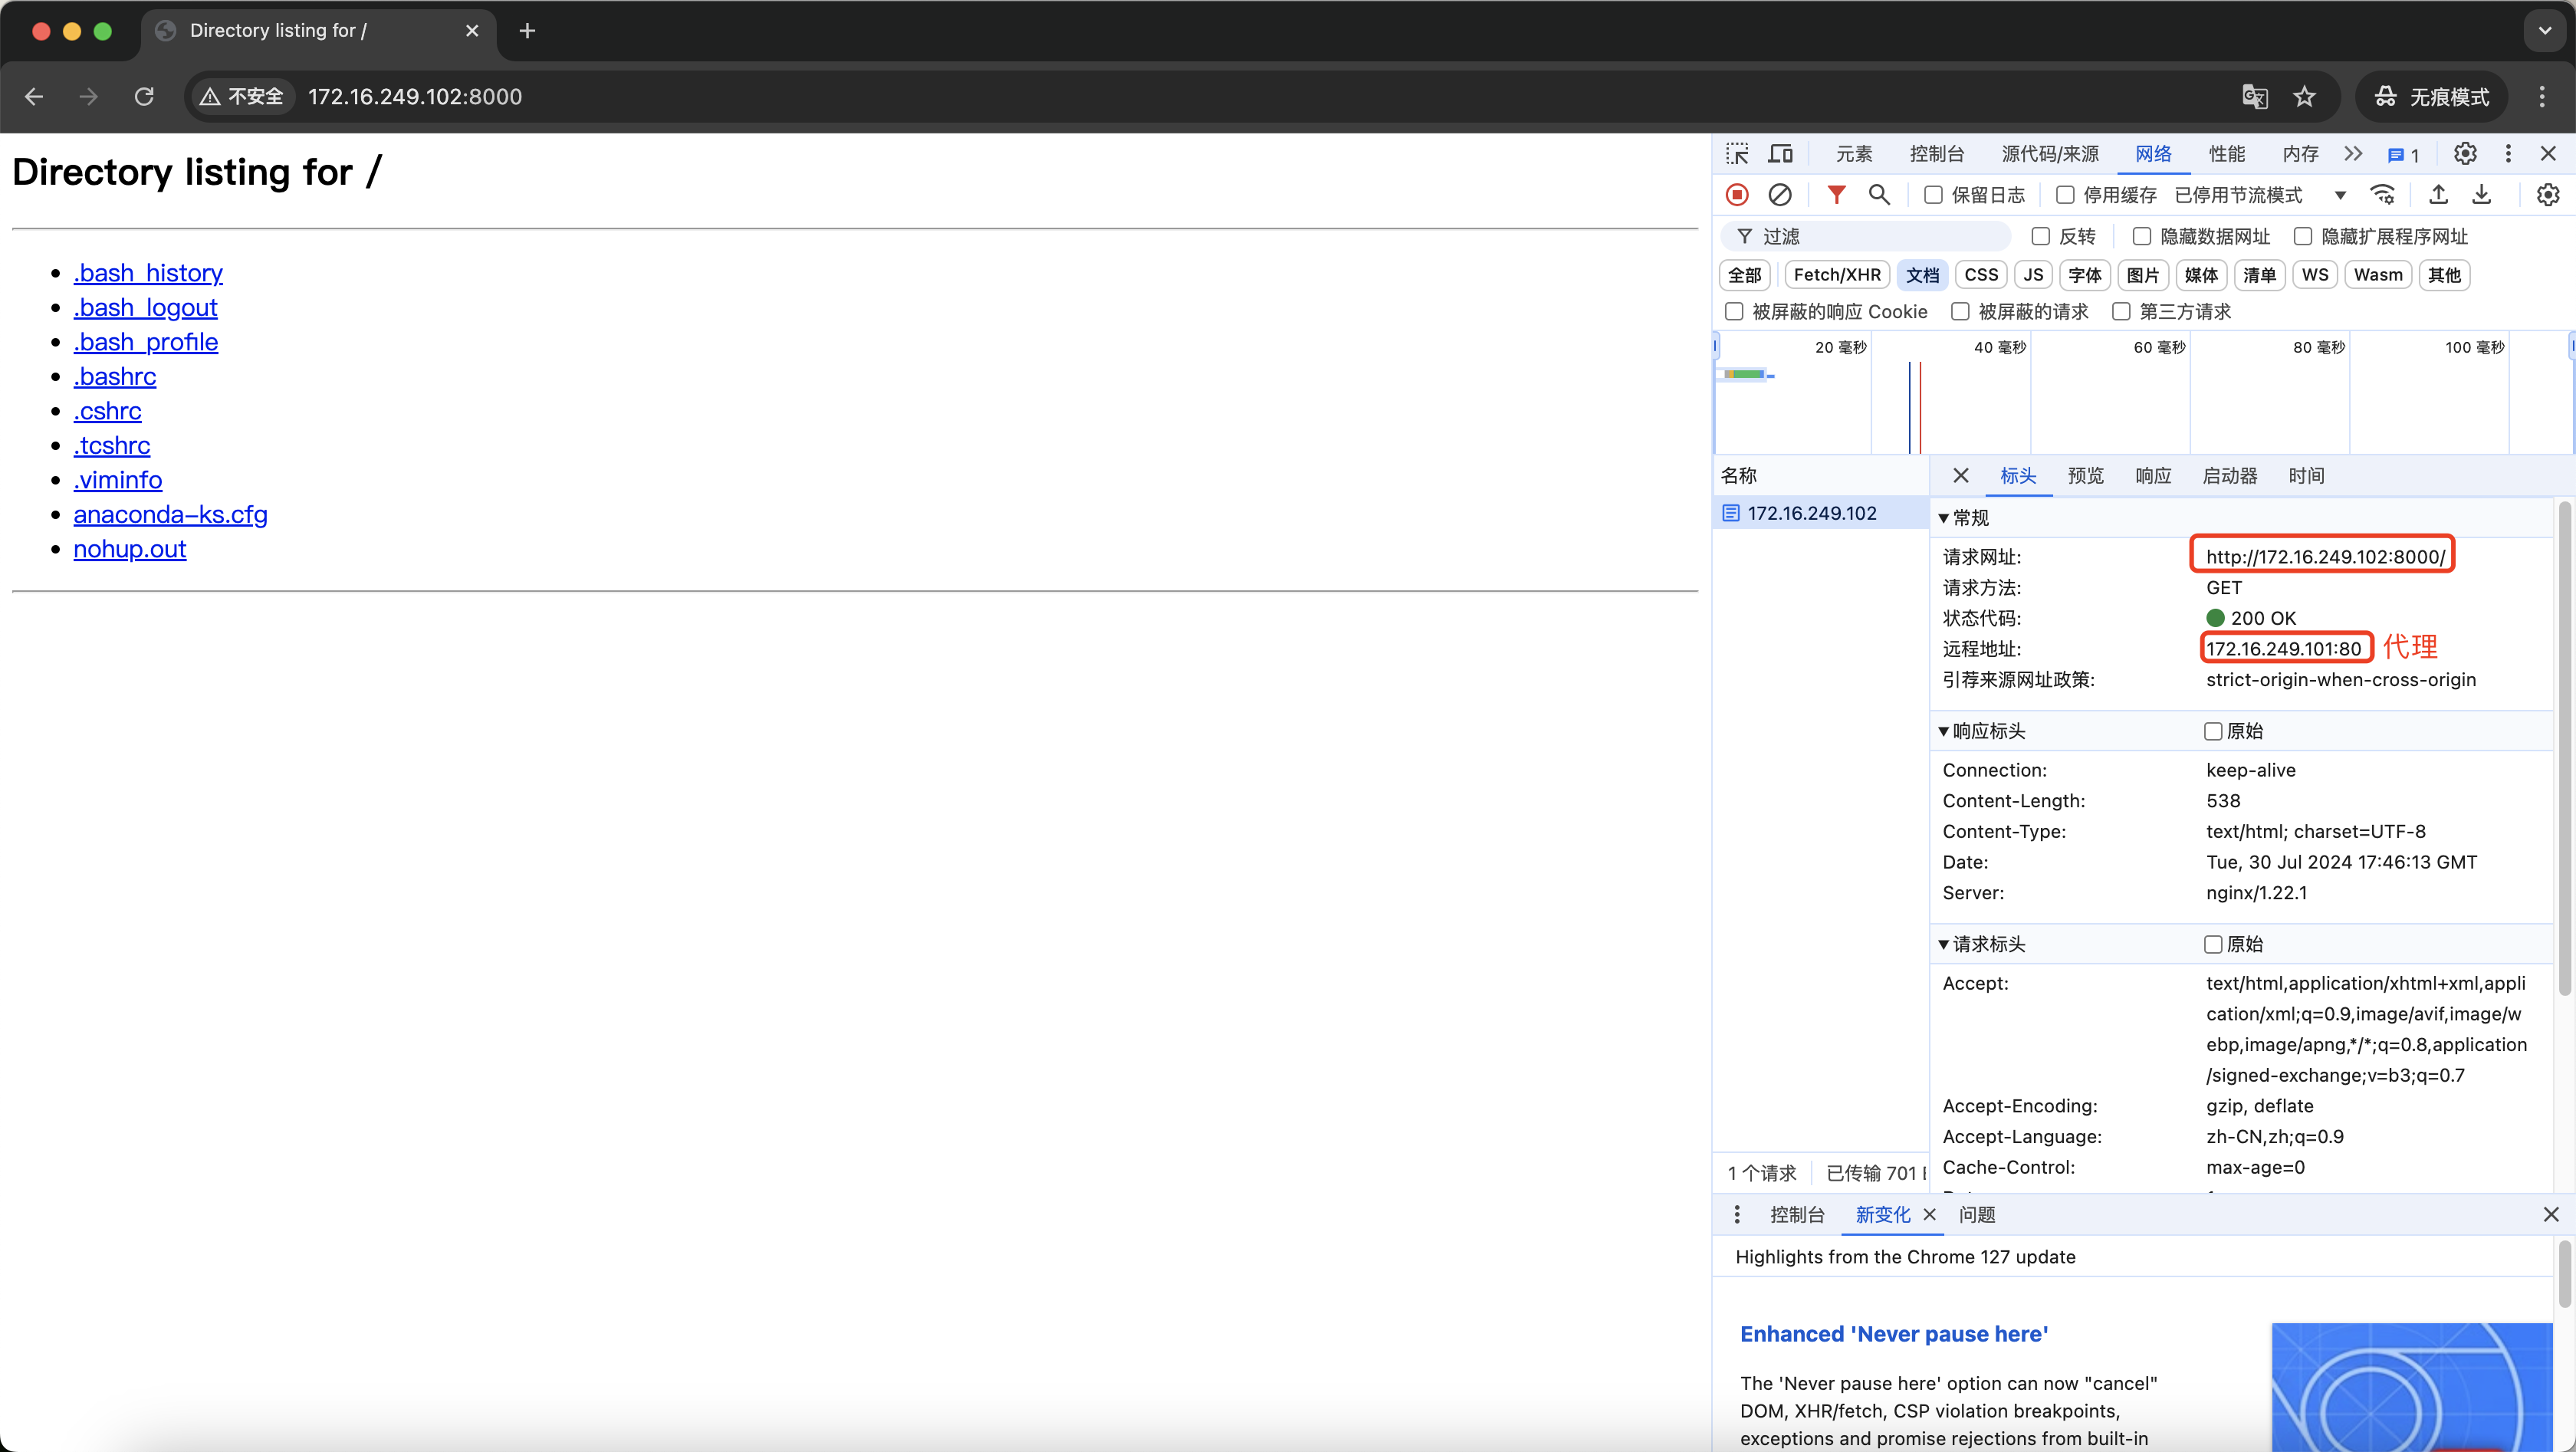
1.3.2 已开启代理
开启代理后,通过网页的network可以看出,我们通过.101做了转发,间接的从.1访问了.102的资源;
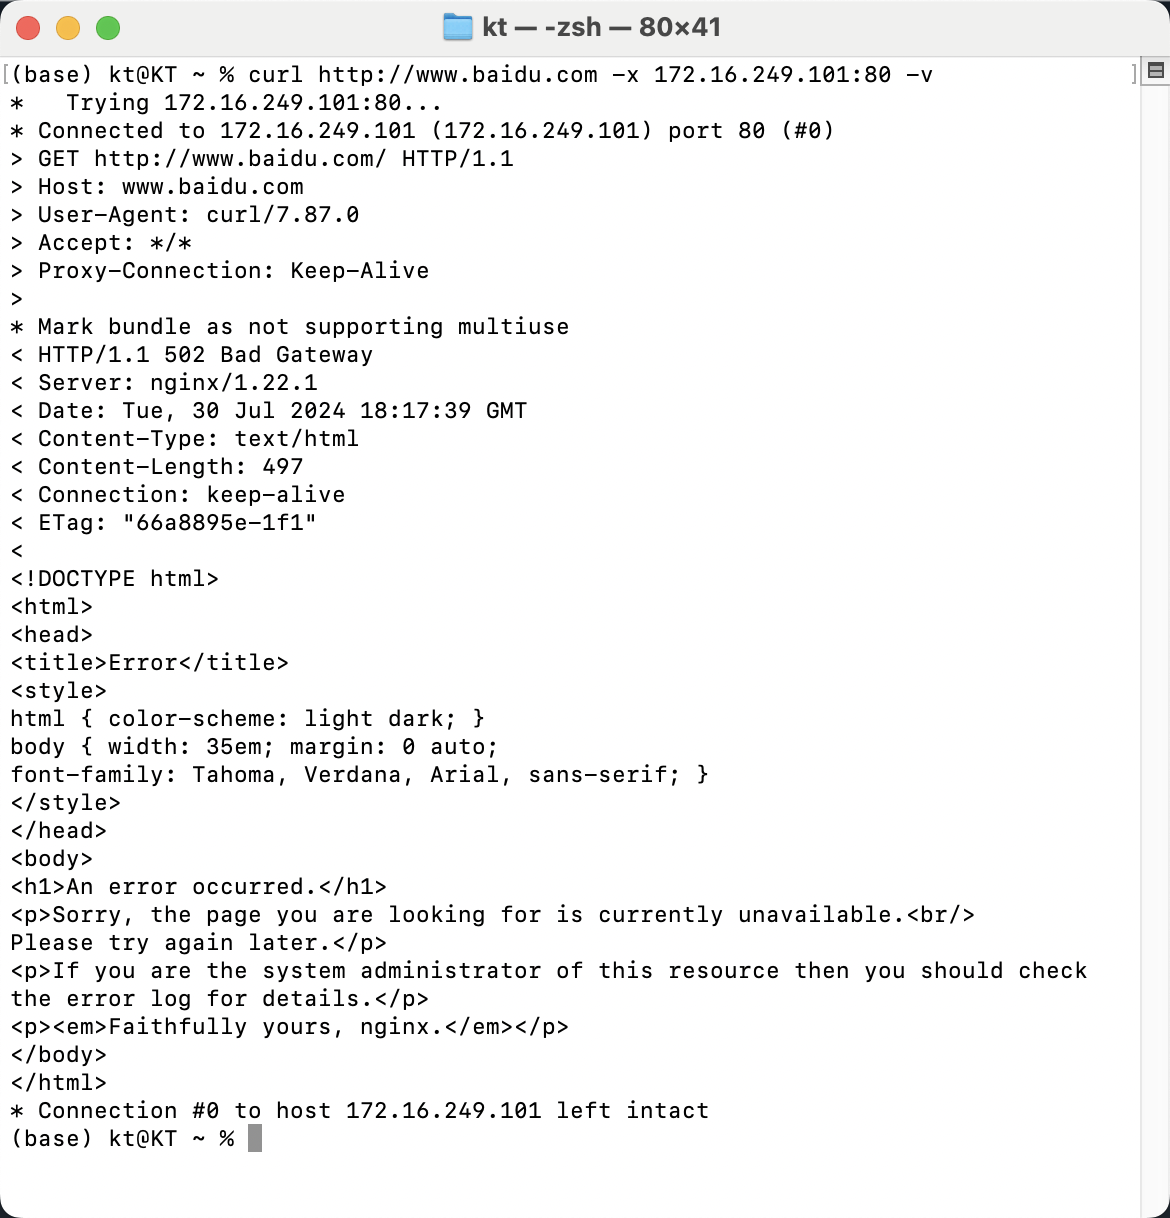
1.3.3 好用的curl测试
也可以通过在客户端A上执行以下代码测试代理情况:
1 | curl http://www.baidu.com -x 172.16.249.101:80 -v |

如果是502可以看下是不是resolver DNSIP配置的不对,不能配置公共的DNS,要配置当前服务器所在环境的网关服务器IP(同解析DNS)
1.4 遗留
http如上,https需要安装补丁ngx_http_proxy_connect_module,参考安装
安装配置完成后,Nginx即可实现http与https的转发。
2 反向代理
2.1 场景
2.2 操作
2.2.1 客户端A
2.2.2 反向代理服务器B
2.2.3 资源服务器C
2.3 测试
2.4 遗留
http如上,https需要安装补丁ngx_http_proxy_connect_module,参考安装
安装配置完成后,Nginx即可实现http与https的转发。
3 注意事项
Nginx配置文件中的 proxy_pass 链接后面一定要加上 /,如果不加的话会拼接上 location 后面的路径导致找不到服务404;
1
2
3
4
5
6
Error response
Error code 404.
Message: File not found.
Error code explanation: 404 = Nothing matches the given URI.示例解释与解决办法如下:
location / :可以访问
虽然8000后面没加 / 但也能访问,因为8000和8000/ 访问的是同样的资源,转发为 http://172.16.249.132:8000/;
location /a:无法访问
因为 8000 后没有 /,转发的时候会自动将location后的路径拼接上去,变成了 http://172.16.249.132:8000/a ,我们没有这样的资源当然无法找到;
location /b: 对比2,可以访问,因为并没有将/b添加到8000后,访问的依旧是 http://172.16.249.132:8000/;
location /c/: 根据上述推断,因为8000后带了/所以不会拼接/c/,访问的依旧是 http://172.16.249.132:8000/;


避免favicon.ico 404
1
2
3
4
location /favicon.ico{
return 200;
access_log off;
}